This guide will show step-by-step instructions on how to setup up email on Outlook 2013 for Windows. While it can be used for other versions of Outlook, some screens and steps might vary.
Adding a new account:
Select the File menu and choose Info
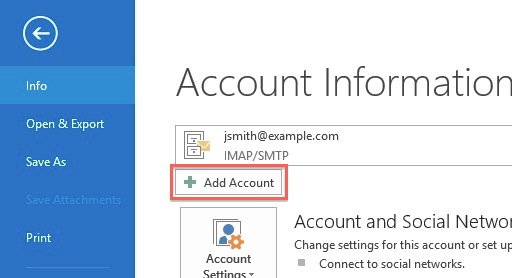
Click the Add Account button.
Choose Manual setup or additional server types

Click Next.
Choose POP or IMAP.
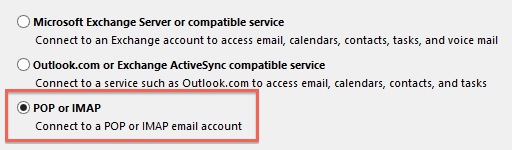
Click Next.
Account Settings:
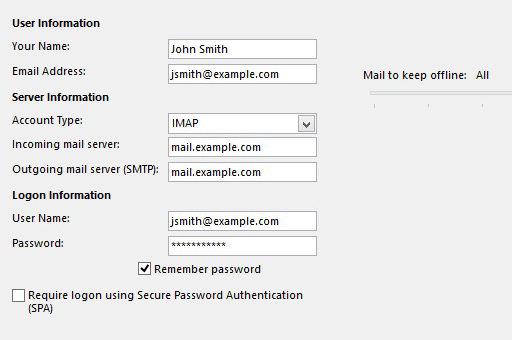
Enter your name as you want it to appear on your outbound email messages.
Enter your email address.
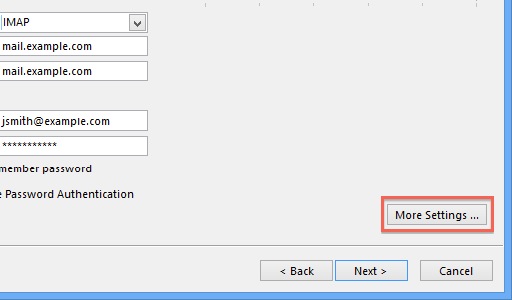
- Enter mail.example.com as your Incoming Mail Server.
- You would not enter example.com but your own domain name.
- The Outgoing Mail Server is the same as your Incoming Mail Server.
Enter your email address for the User Name.
Enter your email password.
More Settings
Click the More Settings button.
Click the Outgoing Server tab.

Click the “My outgoing server (SMTP) requires authentication” checkbox. Make sure that it is using the same settings as your incoming mail server.
Click the Advanced tab.
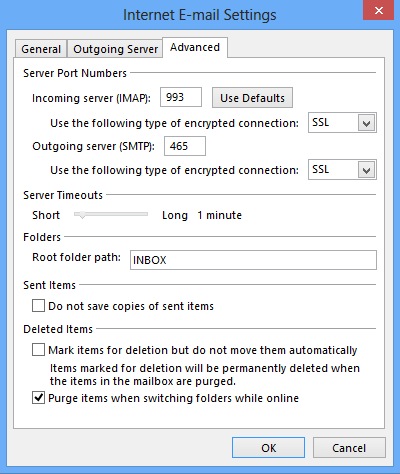
Click the OK button.
If you are using POP3 with SSL, please enter 995 for your port. Otherwise, leave the port at 110.
If you are using POP3, you may choose when messages are removed from the server.
If you are using IMAP with SSL, please enter 993 for your port. Otherwise, leave the port at 143.
If you are using SMTP with SSL, please enter 465 for your port. Otherwise, change the port to 26.
Completing the Setup
Click Next on the E-mail Accounts window.
Click the Finish button.
Outlook 2013 is now correctly configured to send and receive emails.
To get more information about Outlook and Office 365, check this link.